In this section, I will be reviewing some of the basic functionality around variables within Matillion ETL.
I will be discussing:
- The types of variables which can be created in Matillion ETL
- How to set each of these with values and the configuration options available
- Ways in which to use the variables in your Matillion ETL jobs
Type of variable:
1.Environment Variable: Created in and able to be used across entire Matillion ETL.
2.Grid Variable: It is 2D array which store multiple variables.
3.Job Variable: Defined and used in single Matillion job.
Environment variable overview:
Environment Variables are a name:value pair that can be used across the Matillion client. This type of variable can have a different default value set according to the environment. This means that the value can be dependent on the account the user is connected to.
Steps for creating a environment variable:
1.To create an environment variable, click the Project button.
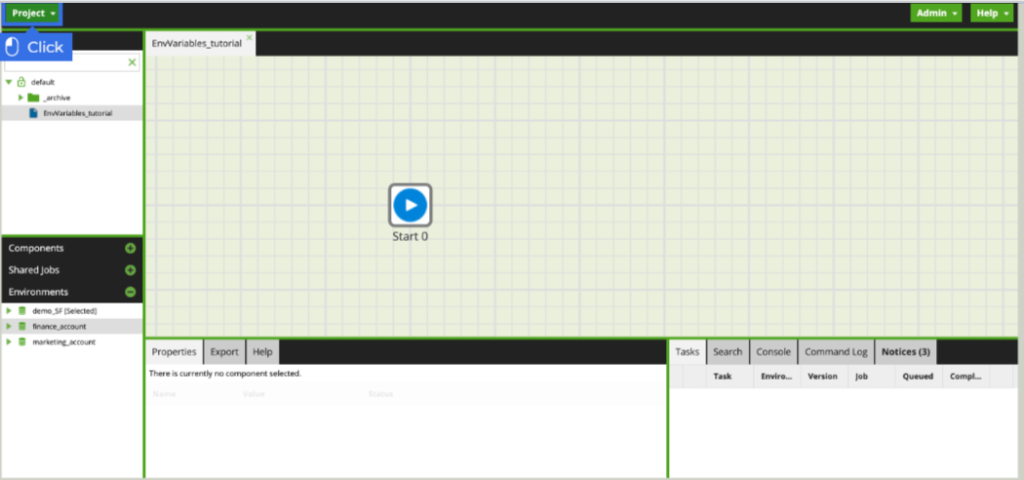
2. Select manage environment variable.

3. The manage environment Variable menu presents any which have been created already and gives the option to enter new ones. Click + button to add a new environment variable.

4. Enter s3_directory as the name of the new variable.

5. Select text as the data type.
6. Though values are not going to be carried between channels, go ahead and select shared as the behavior.
7. Type finance for the value to be used when the finace_account is selected.
8. Click ok to save the new environment variable
How environment variable are used.
1.Click on the component tab.
2. Enter S3 load as search term.
3. Drag the S3 load from the components pane and drop it next to the start component.
4. Let’s use the S3 load not only in how the files are loades from s3 storage,but in how tables are specified as the destination. click to modify the S3 Object Prefix.
5. Upon entering an s3 bucket, the menu will then populate with the directories available within the s3 bucket. Notice the finance directories which will be targeted.
6. Enter ${s3_directory} as the name of the file directory .This ${} references any job or environment variable which has been created.
7. Click Go to save the path.
8. Click OK to save the changes and exit the s3 object prefix menu.
9. Returning back to the workflow, a Python script component has been added to return a customized message with the name of directory the files were loaded from.
10. With the sample workflow complete, let’s run it. Right-click the workspace. Select Run Job (finance_ account).
11. The python script component output relays the success message that the files were successfully loaded from the finance directory.
Job variable Overview:
When setting a job variable there are considerations beyond the name and value. The data type value, behavior and visibility. When set to private, can’t be used when the job is initiated from another job.
Defined and used in the scope of a single job.
How to configure job variable:
1. Right-click the job in the explorer. Select Variable->Manage job variable.
2.Here we see any job variable which is already exist and their configurations. To add new job variable, click + button.
3.We extract the files from AWS S3 Bucket, with the directory and files virialized. Set directory_name as name of the job variable.
4.Set the value to today. We are leaving the default configuration of a text datatype, shared behavior, which will allow set values to carry between channels, and public visibility.
5.Click ok to continue.
How to use job variable:
These variable were created for a transformation job, and we want to use as a field in a table, this can be achieved with a Fixed flow component. Enter Fixed. The Fixed flow component allow the user to define columns and value.
1. Drag the fixed flow onto the workspace.
2.Modify Columns.
3. Click + to add new columns.
4.Enter date as name of the column.
5.Click Ok to save the changes.
6.Modify Values.
7.Enter + button to add values, enter ${directory_name}, this ${} denoted the variables being called.
8.Click ok to save the changes.
9.Now see our job variable work fine or not, click on sample tab then click the Refresh data button.
10.The resulting dataset as defined by the user is the single column date listing the value of the directory_name variable, being “today”. Acting as a table, this can be joined to another dataset.
Grid variable overview:
Grid Variables allow the user to define key-value pairs in an array fashion. Think of it as a type of table which can be passed as a variable.
How to configure grid variable:
1. Right-click the job in the explorer. Select Variable->Manage grid variable.
2. Here we see any grid variable which is already exist and their configurations. To add new grid variable, click + button.
3.We are creating a public, copied grid variable called cfb_metrics.click + button to add new column.
4.Enter cfb_team as the name of the first column and enter cfb_year as the name of the second column.
5.Click Column type field to modify it. Select Numeric.
6.Click Next to set the values of the column.
7.A new row can be entered into Default values menu by clicking + button.
8.The values of the team and corresponding national championship year have been entered. Click ok to save the changes.
9.The cfb_metrics grid variable now exists in the job, and we use it, click ok to continue.
How we use grid variable:
Firstly, we need to create own connector.
1.Go to project->Manage api profiles->Manage Extract Profiles.
2.A new Api profiles called CFB has been set up with an endpoint tiled Games.it will utilize the https://api.collegefootballdata.com/games URI and two parameters-team and year-which will be used to pass the values in the grid variable. Click ok.
Last step before we start building to our job is to establish two environment variable which will be iterated over by grid variable.
Select Manage Environment Variable from the project menu.
Now, two environment variable have been created, click ok to finish the setup .
3.we use API extract Component to draw the data via the api endpoint .Drag the Api extract from the component tab onto the workspace.
4.Within the component pane ,the CFB Api profiles has been selected. Click to modify the Data Source field.
5.Select Games. Click ok to save the changes.
6.Let’s specify Query Parameters.Here we will link the parameters that will be used in the API calls to the environment variable.
7.Click + button to add the first parameter.
8.Click the Parameter Name Dropdown, Select year.
9.Enter ${season_year} as the variable will pass the parameter value.Similarly create team and set value as ${season_team}.Click ok to save the changes.
10.Modify Target Table. Enter CFB_${srasonteam}${seasonyear}.This indicates that each table will begin with “CFB” ,followed by the team name and associated year.Click ok to save.
11.Enter Grid iterator as the search term in the component pane.The grid iterator will allow the passing the values for each row of a grid variable. Since there are three flow of values, the Api Extract component will run three times. Drag the grid iterator onto the workspace.
12.With the grid iterator connected to API EXTRACT, let’s begin configuring it. Modify the Grid variable field.
13.Select the grid variable cfb_metrics,from the dropdown.click ok.
14.Modify the Grid variable Mapping field.This is where we will map columns of the grid variable to the environment variable just set up.
15.Select the first column in the grid variable,cfb_team from the dropdown.
16.Select the environment variable sessonteam.This is specifying that the values which reside in the cfb_team column will pass to the seasonteam variable.
Similarly create the next column of grid variable I.e cfb_year and set up variable name as seasonyear . Click ok .
17.Run job. With the Task pane expanded, we can see details of which combination of values is being used to iterate over the API EXTRACT component.
In the first iteration, we can see the first entry in the grid variable ,being “Auburn” and “2010” and similarly other literation run.
Written By: Sunaina Garg
Edited By: Prabhjot Kaur